Using Atlas Core
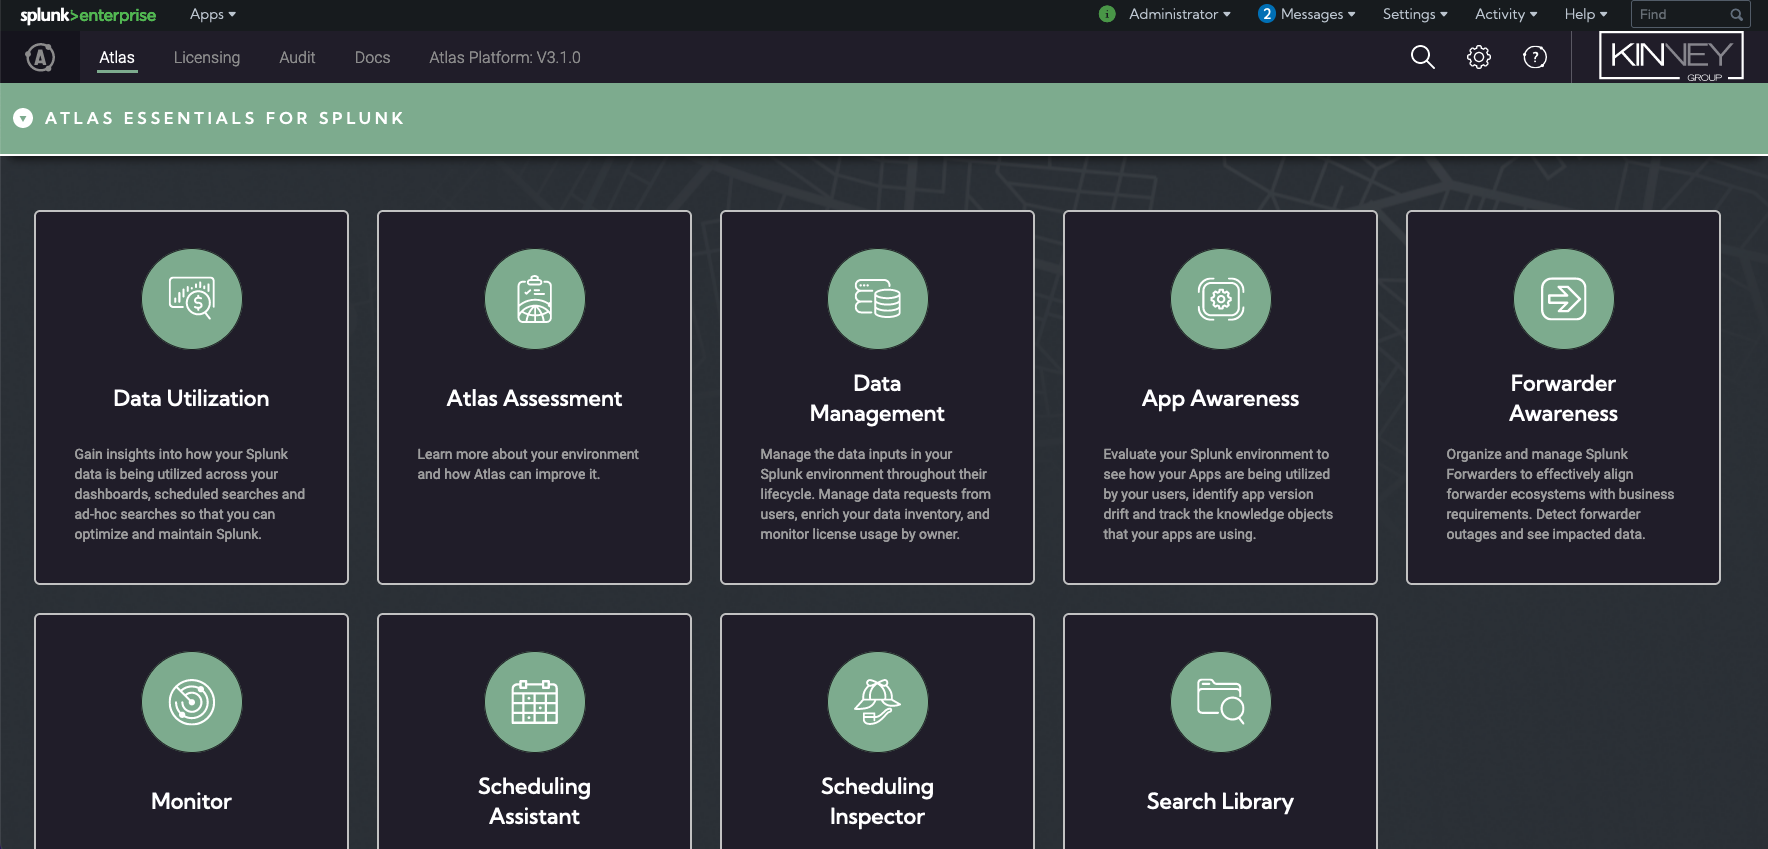
When you first access Atlas, you will automatically be taken to the Atlas Core Element, which contains the following dashboards: Atlas, Licensing, and Atlas Audit. Atlas Elements are accessible through this view only. Atlas Core comes installed with a default configuration and layout that can be customized by an Atlas administrator if desired. Navigation in Atlas Core is simple. There are tiles that represent the Atlas Elements and each tile can live within a section. Sections are used to group Elements together for organization and simplified navigation. Each tile is a link to an Atlas Element or another Splunk app.
Atlas
The Atlas Platform's main form of navigation is the Atlas page on Atlas Core. This page has tiles for each of the Atlas Elements. The tiles each have a brief description of what the Element does and, when clicked, opens the associated Element in another browser tab. Atlas Core installs with a default view which organizes Atlas Elements by type for optimized usage. Atlas Elements are indicated by a green background and cannot be removed from the Atlas Core page. The Atlas Elements will appear here only if they have been installed. Custom tiles that are added will be indicated by either a grey or black background.
The Atlas page layout is customizable and can be used to create a customized user experience for your Splunk users. Atlas Core has been designed to provide simple navigation and allows you to organize your Splunk apps in a meaningful way. A Splunk Admin can modify the default layout by creating new sections, creating custom application links to other Splunk apps, and moving tiles around in a way that is the most helpful for them. Your company or department logo can also be added to the Atlas Core page.
If a Splunk user does not have Read permissions for a Splunk app, the corresponding tile on Atlas Core will not be visible to them.
Edit Mode
The Atlas page provides an edit mode where you can customize the look of your Atlas Core page. You must be in the Splunk Administrator role to use edit mode. To enter the edit mode, click the cog button in the top right corner of the Atlas page. Once you are in edit mode, additional controls will be visible.
The cog button for entering edit mode is found at the top right corner of the Atlas Core Screen. If you do not see this icon, you do not have access to customize the view.

- Save Changes - Use Save Changes to commit your layout changes and make them visible to others. Save Changes will take you out of edit mode.
- Edit Logo - Use Edit Logo to submit an image that will appear at the top right corner of the Atlas Core page. A modal will appear that will walk you through this process.
- Discard Changes - Use Discard Changes to undo any changes that you made in edit and to exit edit mode.
Always click the Save Changes button to ensure that changes are saved and visible to others. If you do not hit Save Changes and exit the edit mode, your changes will be lost.
Creating, Modifying, and Deleting Section Headers
Section headers on the Atlas Core page are used to organize app tiles and logically place them into groups. Section headers can be collapsed by the user when not in edit mode. An app tile section header has a title. By default, Atlas will be installed with sections to help logically organize the Atlas Elements by their purpose or function. All of the default Atlas headers can be modified or deleted.
To create a custom section header:
- Go into edit mode by clicking the cog icon in the top right corner of the page. If you do not see this icon, then you do not have permission to customize this page.
- Once you are in edit mode, locate the gray banner with the + icon that will appear at the very bottom of the page in edit mode.
- Click on the + banner and a section called 'New Section' will appear above. You may need to find the new section by scrolling up the page because it may have been created out of view. Each time you click this button a new header banner will be created.
- From here you can modify the name of the section by clicking the Edit icon on any header bar in edit mode.
- Change the name of header to your desired name and hit Enter to confirm your changes.
- If you need to delete the section header, click on the trash can icon.
- Go back to the top of the page and commit your changes by clicking on the Save Changes button. The Save Changes button must be clicked for your changes to be visible to others.
Creating Custom App Tiles
Splunk Admins can add custom app tiles to serve as links to other Splunk apps on the Atlas Core page. To perform this action you must be in the Splunk Administrator role.
- Go into edit mode by clicking the cog icon in the top right corner of the page. If you do not see this icon, then you do not have permission to customize this page.
- Once you are in edit mode, locate the + button in one of the sections on your layout. Each section will have a + button.
- Click on the + button in the desired section for the Add an Element modal to appear.
- Select the Splunk app from the dropdown list that you'd like to link to.
- The default Title will be pre-populated. If desired, modify the title that will appear on the app tile.
- The default Description for the app will be pre-populated. If desired, modify the title that will appear on the app tile.
- You can also choose to allow the default icon to be displayed or choose a custom icon from the icon library provided by Atlas.
- Click the Submit button.
- Go back to the top of the page and commit your changes by clicking on the Save Changes button. The Save Changes button must be clicked for your changes to be visible to others.
Modifying Custom App Tiles
Splunk Admins can modify existing custom app tiles on the Atlas Core page. To perform this action you must be in the Splunk Administrator role.
- Go into edit mode by clicking the cog icon in the top right corner of the page. If you do not see this icon, then you do not have permission to customize this page.
- Once you are in edit mode, locate the app tile that you'd like to modify.
- Click on the Edit button that appears on the tile and the Add an Element modal appears.
- Select the Splunk app from the dropdown list that you'd like to link to.
- The default Title will be pre-populated. If desired, modify the title that will appear on the app tile.
- The default Description for the app will be pre-populated. If desired, modify the title that will appear on the app tile.
- You can also choose to allow the default icon to be displayed or choose a custom icon from the icon library provided by Atlas.
- Click the Submit button.
- Go back to the top of the page and commit your changes by clicking on the Save Changes button. The Save Changes button must be clicked for your changes to be visible to others.
Moving App Tiles
If you'd like to change the location of an app tile on the Atlas Core page, this can be accomplished using the drag and drop controls on the tile in edit mode. App tiles can be moved around within a section or to another section. To perform this action you must be in the Splunk Administrator role.
- Go into edit mode by clicking the cog icon in the top right corner of the page. If you do not see this icon, then you do not have permission to customize this page.
- Once you are in edit mode, locate the app tile that you'd like to move.
- All app tiles will have an ellipses control in the top left corner of the tile. Use this control to grab the tile and move it to another location on the Atlas core page. Adjacent app tiles will automatically adjust their location to accommodate the tile that you are moving.
- Go back to the top of the page and commit your changes by clicking on the Save Changes button. The Save Changes button must be clicked for your changes to be visible to others.
Branding and Customizing Atlas Core
Atlas Core allows you to change the default logo in the top right corner of the screen with a custom image. This allows you to personalize Atlas Core with your own company or department logo.
Adding a Custom Logo
- Go into edit mode by clicking the cog icon in the top right corner of the page. If you do not see this icon, then you do not have permission to customize this page.
- Once your are in edit mode, click the Edit Logo button. The Edit Logo modal appears.
- Click the + button in the Upload Image box and select your image file from the local file system. (Only image files are accepted (i.e. .png, .gif, .svg, .jpg, etc) and the recommended resolution is 150 x 40 pixels)
- Once your image is uploaded, you will see a preview in the modal.
- Click the Submit button to apply the new image file.
- Go back to the top of the page and commit your changes by clicking on the Save Changes button. The Save Changes button must be clicked for your changes to be visible to others.
Restore the Default Logo Image
- Go into edit mode by clicking the cog icon in the top right corner of the page. If you do not see this icon, then you do not have permission to customize this page.
- Once your are in edit mode, click the Edit Logo button. The Edit Logo modal appears.
- Click the Restore Default button and the default image will appear in the preview window.
- Click the Submit button to confirm the change.
- Go back to the top of the page and commit your changes by clicking on the Save Changes button. The Save Changes button must be clicked for your changes to be visible to others.
License & User Configuration
For applying, updating, and reviewing the current Atlas License Key, review the Getting Started with Using a License Key Documentation.
For User Based Licensing, and updating the assigned Splunk accounts that can leverage the Atlas Platform, refer to the Getting Started with Assigning Users Documentation.
Atlas Audit Dashboard
Atlas Audit is included in Atlas Core and it allows you see all activities performed by users in Atlas. The most important aspect of Atlas Audit is that it tracks the details about the changes that are made to your Splunk system. Use Atlas Audit to monitor and track the usage activity of the Atlas Elements in your environment.
The Atlas Audit page contains two tables. The Atlas Audit Summary table shows which Atlas Elements are installed on your system and high-level user activity data for each Element. The default time range for this information is set to 30 days but can be changed by selecting a different range in the Time Range selector. Clicking on a row in the Atlas Audit Summary table will modify the table below
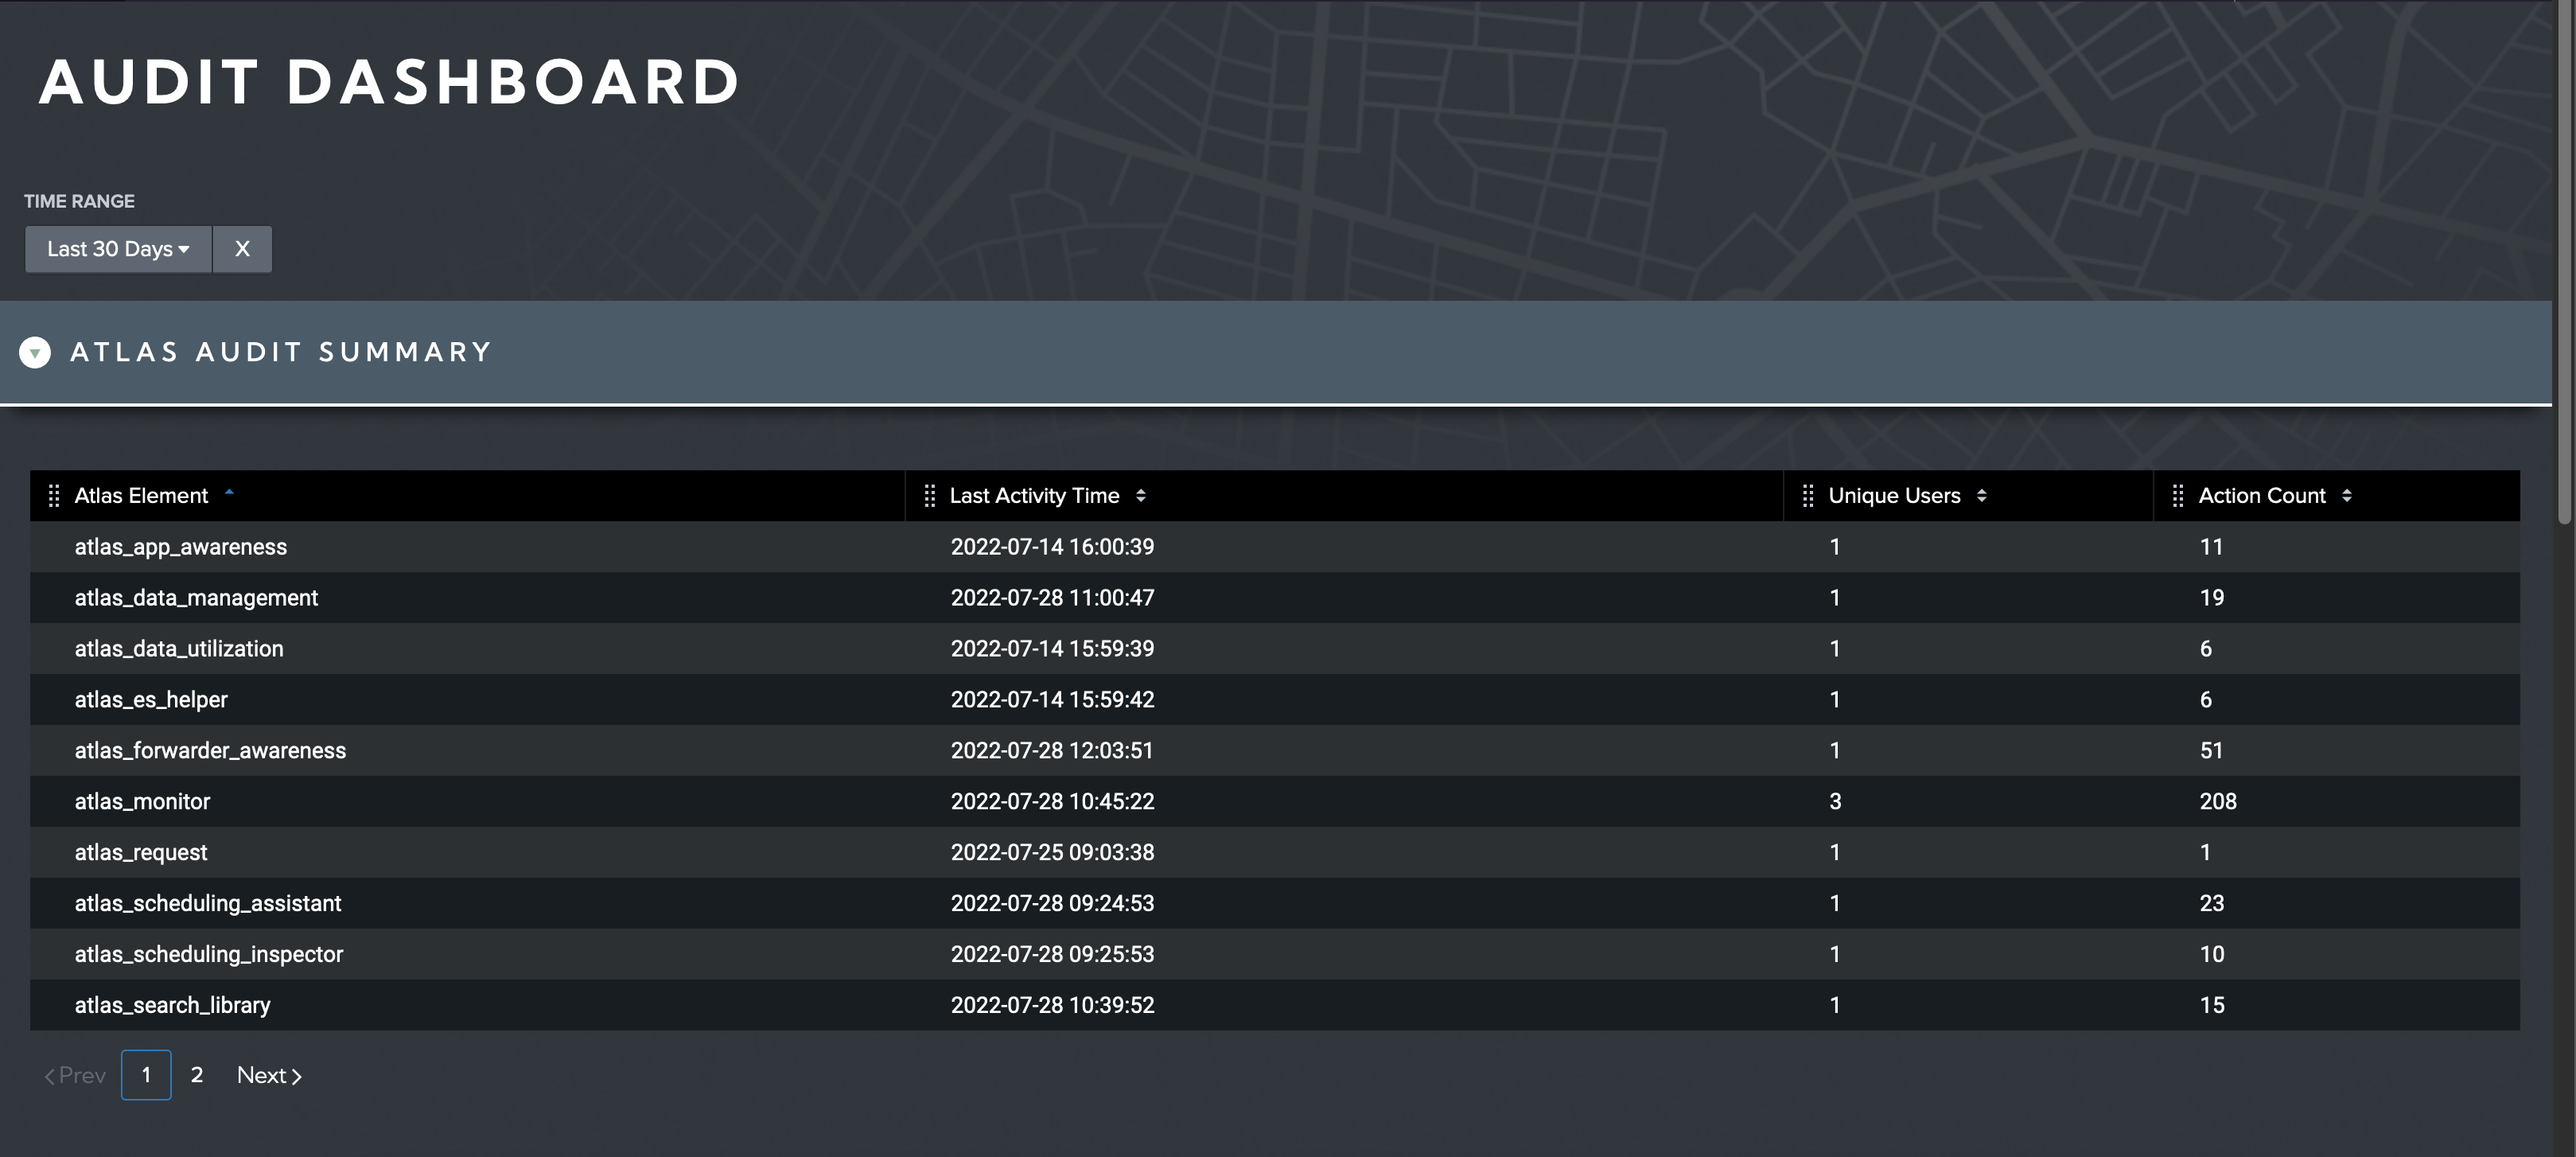
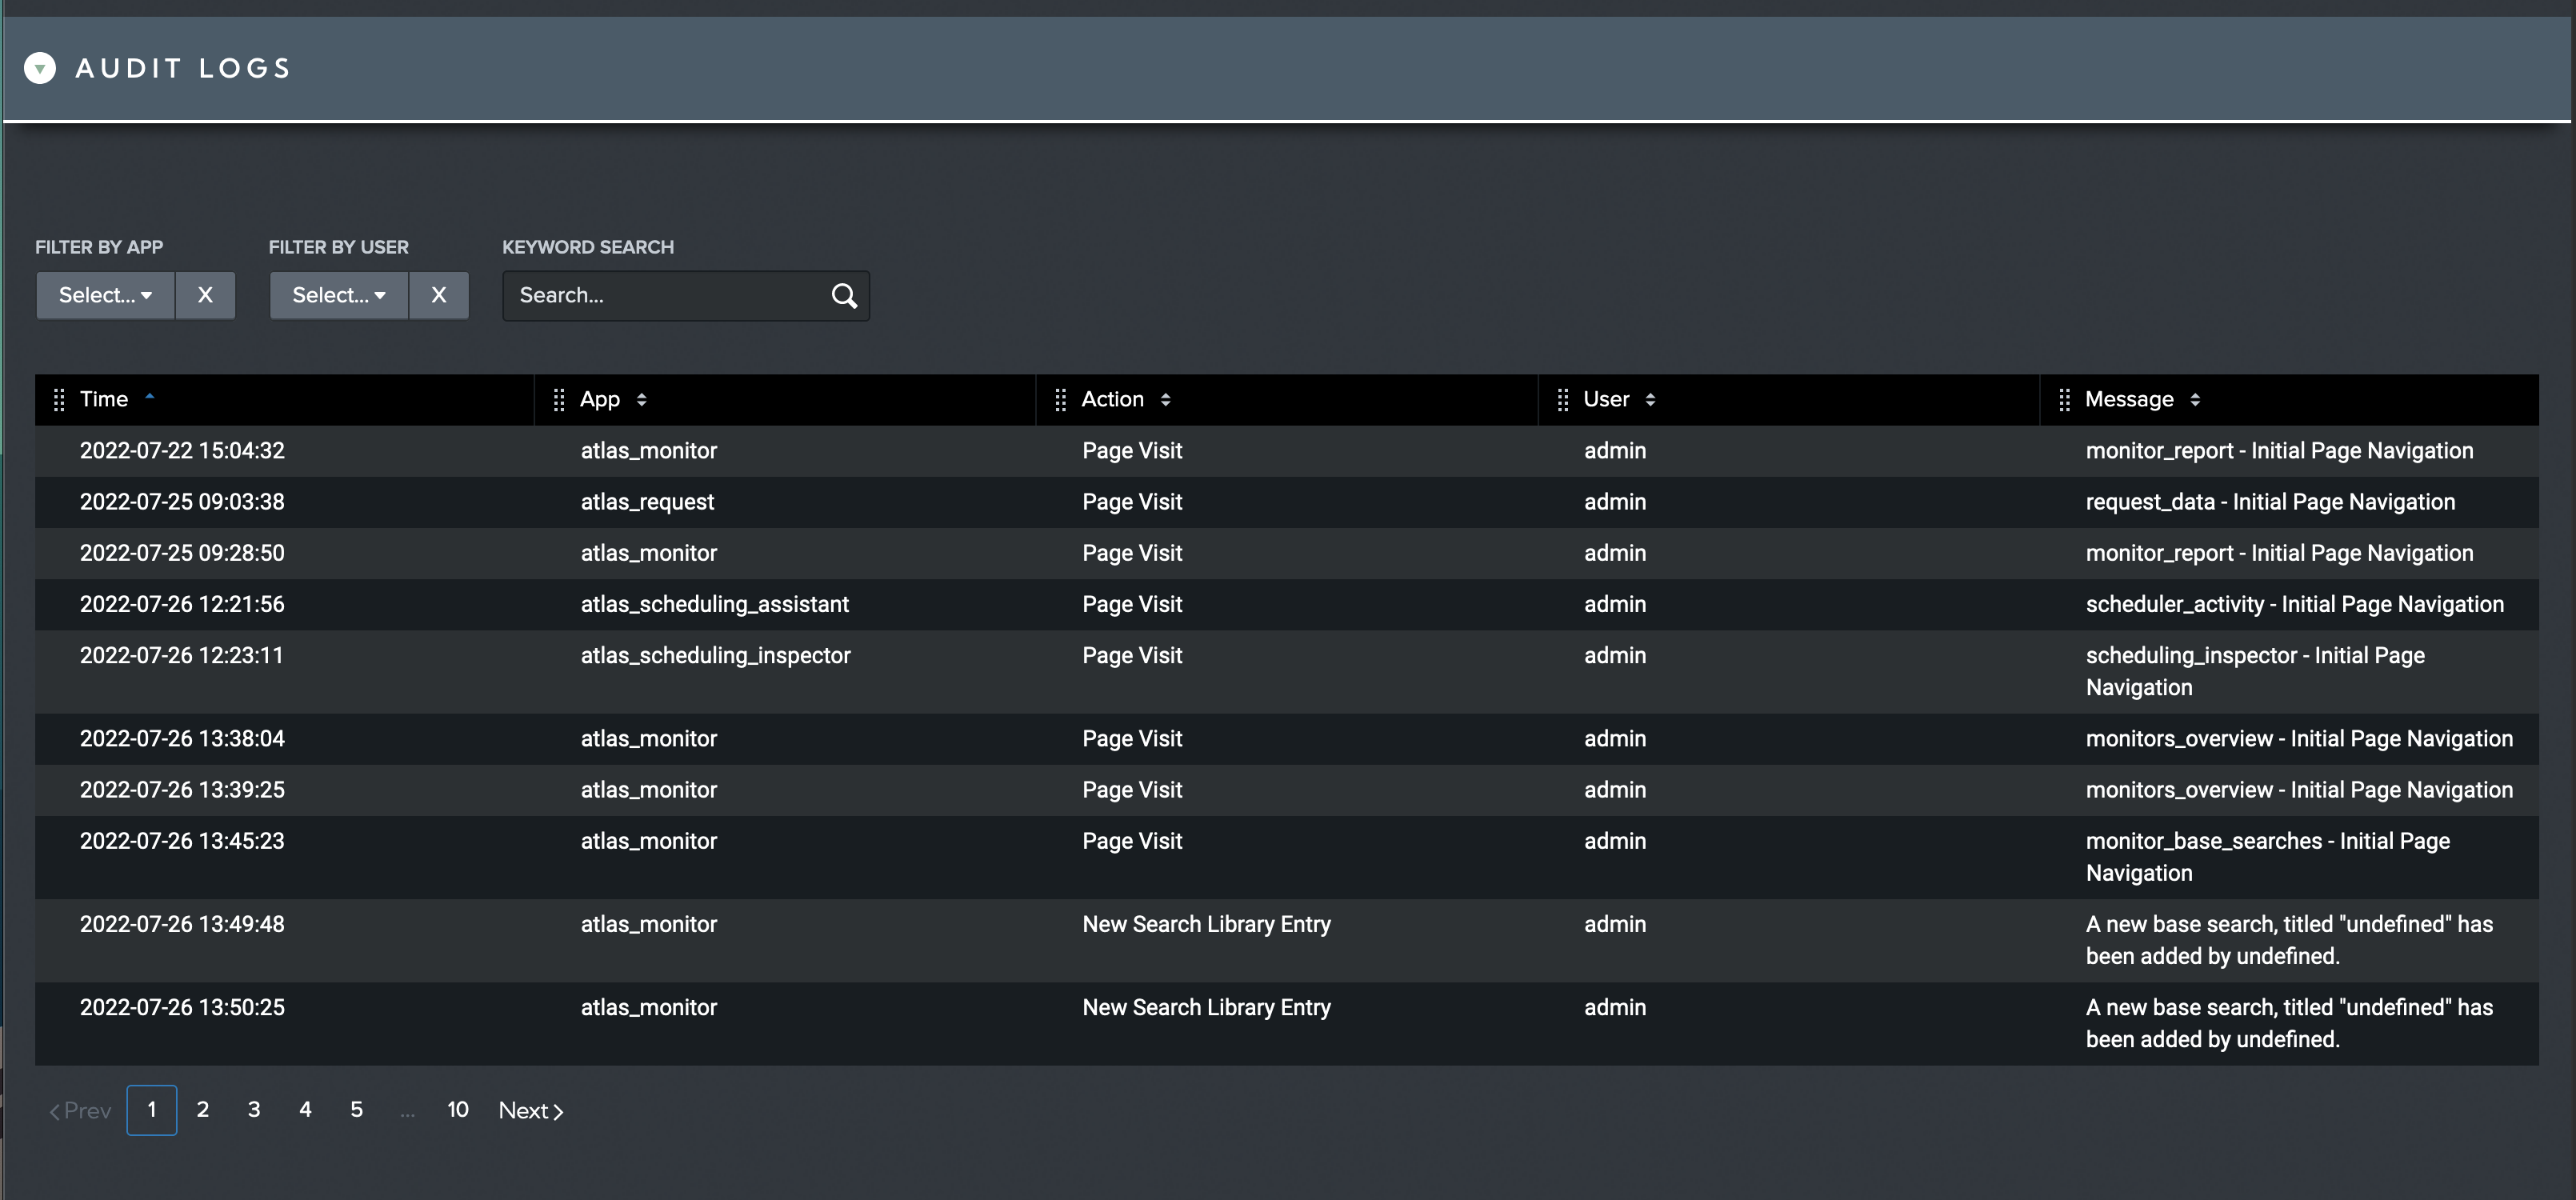
The second table on this page is the Audit Logs table. This table contains the record of the events from the Atlas Element. This report can be filtered by app, user, or keyword using the filters at the top of the report or by clicking the Element in the Atlas Audit Summary table.
Modifying Tables and Exporting Data
The columns on these tables are movable and can be ordered to suit your needs. They can also be exported by clicking on the export button that appears in the top right corner of the table when you hover over it with your pointer. Use the export feature to export the data from Splunk into an external file. The data will be exported in the format that it appears on the screen. Reports can be exported in .CSV, .XML, or .JSON format.
Atlas Help
In Atlas Core, a help icon is located in the banner on the top right corner of the screen. Clicking on this help icon will activate the dynamic help tool. The help information provided is contextual to the page that you are currently on so that it can provide you with basic guidance for the page that you are currently on. You can also access the Atlas documentation site and get to the Atlas Customer Portal from the help tool. The help tool is accessible to any Atlas user.
The dynamic help tool is always accessible by clicking on the Atlas Help icon at the top of the page.
![]()