Version: Atlas v3.11

Atlas Splunk Cloud Deployment Instructions

Installation Overview
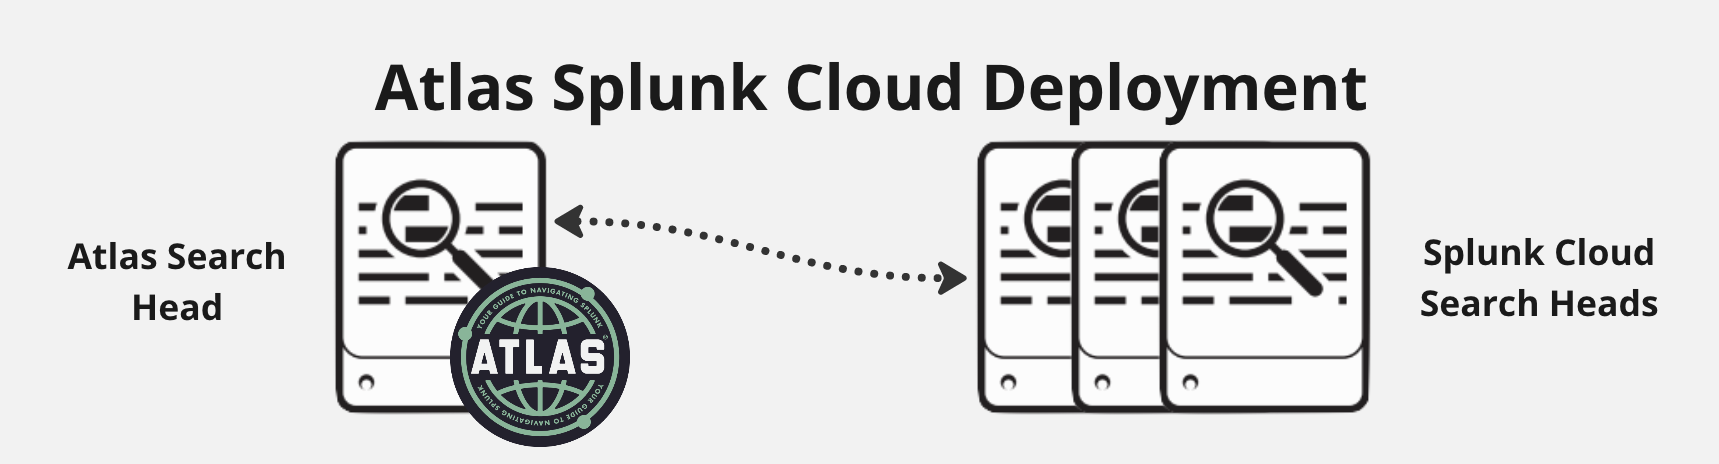
Atlas for Splunk Cloud requires that a Splunk Search Head be deployed in your local environment that will connect to your Splunk Cloud environment. This Search Head must be configured as a Federated Search Head. Atlas will be installed on this Search Head and will connect to your Splunk Cloud environment. This Search Head will be referred to as the “Atlas Search Head” throughout the remainder of this article. The Splunk Cloud environment that the Atlas Search Head connects to will be denoted as "Splunk Cloud Environment". Once deployed, you will add the Splunk Cloud Search Head as a search peer on your local Atlas Search Head to allow use of the Splunk REST command.

Deployment

The Atlas Search Head Deployment Guidelines

  • Can be deployed in a clustered or non-clustered architecture or can also be an all-in-one (AIO) Splunk deployment
  • Must be deployed to an environment that is outside of your Splunk Cloud environment
  • Must be able to connect to Splunk Cloud over the internet (Typically over ports 8089, 8181, and 8191)
  • Meet the Installation Prerequisites

Feature Restrictions Specific to Deployment

Due to deployment architecture, some Atlas functionality and Atlas Elements are not available:

  • Scheduling Assistant ability to update search schedules and disable searches on Remote Search Heads limited to Admins only leveraging Atlas Targets
  • Scheduling Inspector ability to change search time ranges and search owners on Remote Search Heads is deactivated
  • STIG Compliance element is currently not supported on Dedicated Deployments

Atlas Installation

For additional assistance with completing these steps, please reach out to your Expertise on Demand Team or submit a request to support@kinneygroup.com.

Configure the Atlas Search Head and REST Connections

Once you have installed and configured your Atlas Search Head you will need to connect it to your Splunk Cloud environment. If you are completing these items yourself, these steps are best executed using Splunk Cloud's Admin Config Service (ACS).

  1. Allow your Atlas Search Head's public IP on your Splunk Cloud Environment for REST API access.

    • This can be accomplished using the following methods:
      • ACS
      • Splunk server settings UI
      • Opening a request to Splunk Cloud support
  2. Configure Federated Search on the Atlas Search Head

    • Create an account on your Splunk Cloud instance with fsh_manage permission

    • On the Atlas Search Head, in Splunk Web, navigate to Settings -> Federated Search -> Add Federated Provider

    • Create a new Federated Provider in transparent mode using your Splunk Cloud URI and the account that was created above

    • See the Splunk documentation for more information on this topic

  3. Add the Splunk Cloud Search Head as a search peer on the Atlas Search Head

    • In Splunk Web on the Atlas Search Head, navigate to Settings -> Distributed Search -> Search Peers. Your indexers (both Splunk Cloud and local if applicable), should already be listed here.

    • Using the New Search Peer button on this page, add any other Splunk instances that you wish to be able to search or perform REST calls against.

      • Adding instances from your Splunk Cloud deployment requires the user credentials of a Splunk Cloud user with the role ofsc_admin
      • The search heads that you add, must be an equal or higher version than the search peers.

Atlas Distributed Install Matrix

Use the tables below to determine where and how to install the Atlas Platform. Depending on your environment, your preferences, and the requirements of the add-on, you may need to install Atlas Elements and Technical Add-Ons (TAs) in multiple places.

Atlas ElementDedicated Search HeadSplunk Cloud Search HeadsHeavy ForwardersUniversal ForwardersComments
Atlas CoreYesNoNoNo-
Atlas AssessmentYesNoNoNo-
App AwarenessYesNoNoNo-
Data ManagementYesNoNoNo-
Data UtilizationYesNoNoNo-
ES HelperYesNoNoNoOther deployment options may be considered, see ES Helper documentation for more information
Forwarder AwarenessYesNoNoNo-
MonitorYesNo*NoNoMonitor Index should be made manually on Splunk Cloud system
Monitor TAYesNoNoNoInstall on Index & Search Head Layer to create required Indexes
Performance & Capacity An.YesNoNoNo-
Scheduling AssistantYesNoNoNo-
Scheduling InspectorYesNoNoNo-
Splunk Migration AssistantYesNoNoNo-

For Atlas Monitor, further information can be found on its Documentation Page.

The following procedure will outline the steps required to install the Atlas Platform on your local Atlas Search Head.

Installing Atlas Elements

Locate the Atlas Installer .tgz file (SA_atlas_installer-<version>.tgz) received when Downloading Atlas. Follow the guidance below for installing the application via the Splunk Web UI or CLI. The Atlas Platform Elements can then be automatically installed by running the installer script.

Splunk Web Upload

  1. Sign in as a Splunk Admin on your Atlas Search Head and navigate to Apps -> Manage Apps in the Splunk Web UI.

  2. Click on the Install App from File button located in the top right.

    Step 3

  3. Select the SA_atlas_installer-<version>.tgz file and Click "Upload". If you experience an issue, try selecting the “Upgrade App” checkbox when repeating the upload process. This option is required when upgrading to a new version of the Atlas Installer.

    Step 4

    note

    You can confirm a successful upload of the file by searching “Atlas” on the Manage Apps screen, listing the Atlas Installer in Splunk's applications.

Splunk CLI Installation

  1. Using any available method, copy the application to an accessible directory on the Splunk Server where Atlas will be installed. The example below uses the scp utility.

    scp SA_atlas_installer-<version>.tgz splunk@atlas-search-head.example.com:/tmp
  2. Using any available method, access the CLI on the Splunk Server where the Atlas Installer has been copied. If applicable, become the Splunk service user.

    ssh splunk@atlas-search-head.example.com
  3. Run the Splunk CLI application installation command on the provided SA_atlas_installer-<version>.tgz. Adjust relative paths accordingly, or use absolute paths as documented. Address prompts for Splunk authentication as needed by providing valid credentials of a user configured with the admin role for the Splunk instance.

    # Where $SPLUNK_HOME is Splunk's home directory, e.g. /opt/splunk
    $SPLUNK_HOME/bin/splunk install app /tmp/SA_atlas_installer-<version>.tgz

Running the Atlas Installer Script

The Atlas Installer script must be run from the CLI. If the SA_atlas_installer application was installed via the CLI, skip to step 2.

  1. Using any available method, access the CLI on the Splunk Server where the Atlas Installer has been copied. If applicable, become the Splunk service user.

    ssh splunk@atlas-search-head.example.com
  2. The installer can be run without any arguments to guide an administrator through a series of prompts. The installation process can be customized by providing options detailed under Atlas Installer CLI Options. Basic usage of the installer script is shown below:

    # Where $SPLUNK_HOME is Splunk's home directory, e.g. /opt/splunk
    $SPLUNK_HOME/bin/splunk cmd python $SPLUNK_HOME/etc/apps/SA_atlas_installer/bin/atlas_installer.py
Atlas Installer Default Prompts

Running the installer script without any options will provide a series of prompts to modify the type of installation and confirm the resulting installation directories.

  1. In the first prompt, select the Deployment Type.

    Select Deployment Type:

    1 - Standalone Search Head
    2 - Deployer (SHC)
    3 - All in One

    Enter selection (1-3): 1
    • Standalone Search Head: This option installs the Atlas Elements to the $SPLUNK_HOME/etc/apps directory for use on the local Search Head. Any Elements requiring installation on additional Splunk Server types can be copied to the appropriate locations for manual installation (e.g. Cluster Manager for TA deployment to Indexers)

    • Deployer: This option installs the Atlas Elements to the $SPLUNK_HOME/etc/shcluster/apps directory, allowing admins follow standard deployment procedures to Search Head Clusters

    • All in One: This options installs the Atlas Elements to the same location as the Standalone Search Head option, $SPLUNK_HOME/etc/apps, while also copying any appropriate Elements to the $SPLUNK_HOME/etc/deployment-apps directory. This allows for the use of the All in One Atlas Server to push relevant Atlas configurations to Universal Forwarders with minimal configuration of the Deployment Server functionality.

      note

      If no Elements in the acquired installation package are intended to be deployed by Deployment Server, the installation procedure for this option only deploys to the $SPLUNK_HOME/etc/apps directory.

  2. In the second prompt, confirm the installation paths based on the previous selection.

    Destination path(s):

    /opt/splunk/etc/apps

    Proceed with installation? [y/n]: y
  3. Restart the Splunk service after the script completes.

    $SPLUNK_HOME/bin/splunk restart
Atlas Installer CLI Options

Run the installer script with the --help option to see additional details on setting deployment types without interactive prompts.

$SPLUNK_HOME/bin/splunk cmd python $SPLUNK_HOME/etc/apps/SA_atlas_installer/bin/atlas_installer.py
usage: Atlas Platform Installer [-h] [--install-type {local,deployer,aio}]
[--exclude {es,smh}]

This Supporting Add-on installs the Atlas Platform for Splunk.

optional arguments:
-h, --help show this help message and exit
--install-type {local,deployer,aio}
Target Splunk server type for installation.
--exclude {es,smh} Exclude special-use element sets.

Visit the Atlas Documentation site for more details:
https://https://docs.atlas.kinneygroup.com/

Review Required Splunk Permissions & Capabilities

You must now ensure that user permissions are set correctly to ensure that you get the most out of Atlas. Instructions for setting these permissions can be found on the Atlas Capabilities & Permissions page.

Configure Atlas Audit

After the Atlas Elements have been installed and configured you should also configure Atlas Audit. Atlas Audit tracks activities performed by your users using Atlas. This information stays in your Splunk environment and can be used to track changes made to your Splunk deployment by your users using Atlas.

  1. Using your preferred method, create an index in Splunk with your desired name. The default is atlas_audit.

  2. The index used by Atlas Audit is specified in the atlas.conf file located at $SPLUNK_HOME/etc/apps/atlas_core/default/. You do not need to change anything in this file unless you plan to use a different index name. The contents of the atlas.conf file should look similar to the following:

    [license]
    license_key =

    [atlaslogs]
    index = atlas_audit
    sourcetype = atlas_logs
    caution
    • Do not alter the sourcetype in the atlas.conf file. The sourcetype must remain atlas_logs for proper operation.
    • Do not edit the atlas.conf file in the /atlas_core/default/ folder. Any changes made there will be overwritten during an upgrade. Make any changes in the /atlas_core/local/ folder.
  3. Restart the Atlas Search Head to start capturing audit events.